An easy way to update your knits is to add fringes. You can add them without damaging your sweater - so you can always remove them again if you change your mind.
Why not jump on this trend and have some fun without having to buy new things - true sustainable fashion!
This is how you do it:
 You will need: yarn, knitted garment, crochet needle, scissors and a piece of cardboard. The cardboard should be the width as you want your tassels long.
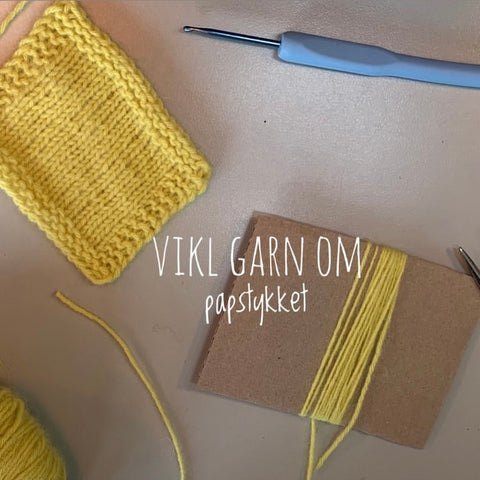
Wind the yarn around the cardboard (many times!)
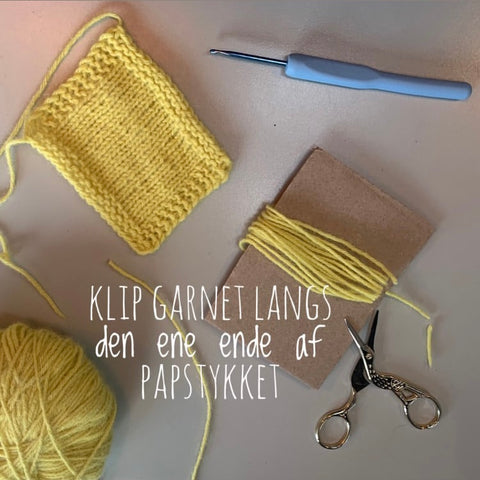
Cut along one end of the cardboard to get many pieces of yarn of the same length.

Pick off three pieces.

Put the crochet needle up through the bottom of a stitch.

Pull the three threads through.
Pull tight.
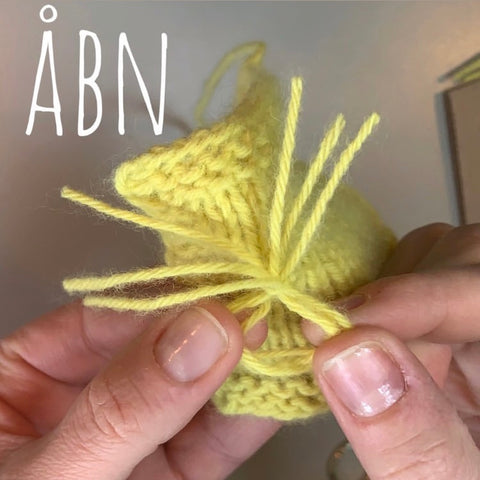
Open the loop.

Pull the ends through.

Tighten and you have your first tassel.

Do it again..

And again and again. Until you have the full fringe.
To make the fringes on the mauve sweater::
- Find the middle of the front and place a marker at the depth you want your V.
- Place a marker in the raglan strip approx. 2cm from the neckband.
- Attach tassel along a straight line between the two marker - use a knitting needle and markers to keep track of the line.
- Repeat in the other side of the front to get a V.
- Then repeat it all on each of the sleeves.