There are lots of ways you can add a little extra to your stockinette works. A very easy and fast way is to use duplicate stitch. It is almost like painting with each of the stitches as pixels. The final result will look almost as if you knitted it like that.
When you embroider with duplicate stitch, you pull the yarn - in the colour you want to "paint" - through on top of the existing stitch. It is a good idea to use a yarn similar to the one you knitted in but it can be a bit heavier.
You can also use duplicate stitch to repair worn down knits. But it is important to do it before there is a hole as it becomes much more difficult to repair.
You can easily make your own pattern. Just make crosses on checkered paper or use an online tool - eg. stitchfiddle. Just note that your stitches arent square but rather a rectangle that is wider than it is tall. so your drawing will get a bit squashed. The ratio between the height and width is usually about 0.6-0.8 so you should have about 4 stitches tall for every 3 wide.
To get started you will need:
- Knitted garment to embroider on
- Yarn for embroidering
- Scissors
- Needle
Enjoy!


Pull the yarn up through the middle of the stitch you want to colour - in the middle of the V.
Remember to leave a tail of yarn on the back for weaving in at the end.

Pull the needle behind both legs of the stitch above.
Note that it does not matter if you sew left to right or vice versa.

Pull the thread through. Make sure not to pull it too tight or too loose.
Stick the needle back down in the middle of the stitch and up through the middle of the next.

Pull the yarn through.

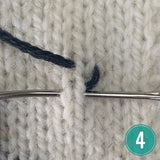
Sew horizontally through the stitch above.

Stick down through the middle of the stitch and up through the next.

Pull through.

Continue "painting" your stitches to create the shape your want.

When you change row stick the needle up through the stitch above instead of through the neighbour.

Admire your work and give yourself a high five.

Weave in the ends on the back.
The little hat from the tutorial can be embroidered using this pattern but I think you should be creative and make up your own pattern.
